The other day a new editor asked me how to export a still graphic, like a .jpg, from Avid Media Composer. By now it’s second nature how to export a graphic in Avid but once I started explaining it I realized there’s a lot more that goes into it than a couple keystrokes and some clicks I no longer have to think about.
Here’s how to export still graphics, like .jpg and .png, from Avid Media Composer:
1. Selection
First, select the In Point and Out Point around the frame of video you want to export. Then select the track(s). You do not have to select every video track if you don’t want to. If you have your shot on V1 and just select that track and not V2 and V3 where titles and graphics could be, you will only export the shot. If you select all the tracks you’ll get the graphics and titles too.
2. Export
You can export a variety of ways such as right-clicking the Record Monitor and selecting “Export…” or you can set a key for it using the command palate and keyboard settings. For what it’s worth my shortcut is Shift+M. The simplest way is to go to the File > Export… Once you do this the Export As… box will open.
3. Export Settings
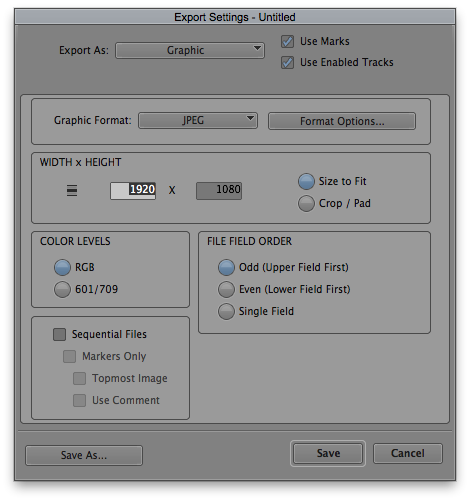
Next change the Export setting by clicking Options… (it’s at the center-bottom of the Export As… box). The settings for the current selected setting will pop up. Under the Export As: dropdown menu, select Graphic. Then select the format under the Graphic Format dropdown. You can choose from .jpg, .png, .tif and more. Then select the pixel size (1920×1080, 864×486, etc.). You more than likely want it to be whatever your project size is. Click on the Fast Menu next to the numbers for quick references on dimensions.
Make sure Use Marks and Use Enabled Tracks are selected. Use Marks means the In and Out Points you selected will be used. Use Enabled Tracks means that only the selected tracks will be used. I recommend always keeping these on and manually checking the tracks you want exported.
It’s important to save your newly created settings. Click Save As… in the bottom-left corner and give it a name. An example name would be JPEG_1920x1080. The next time you export it’ll appear as an option in the Export setting dropdown menu and you won’t have to go through this process again.
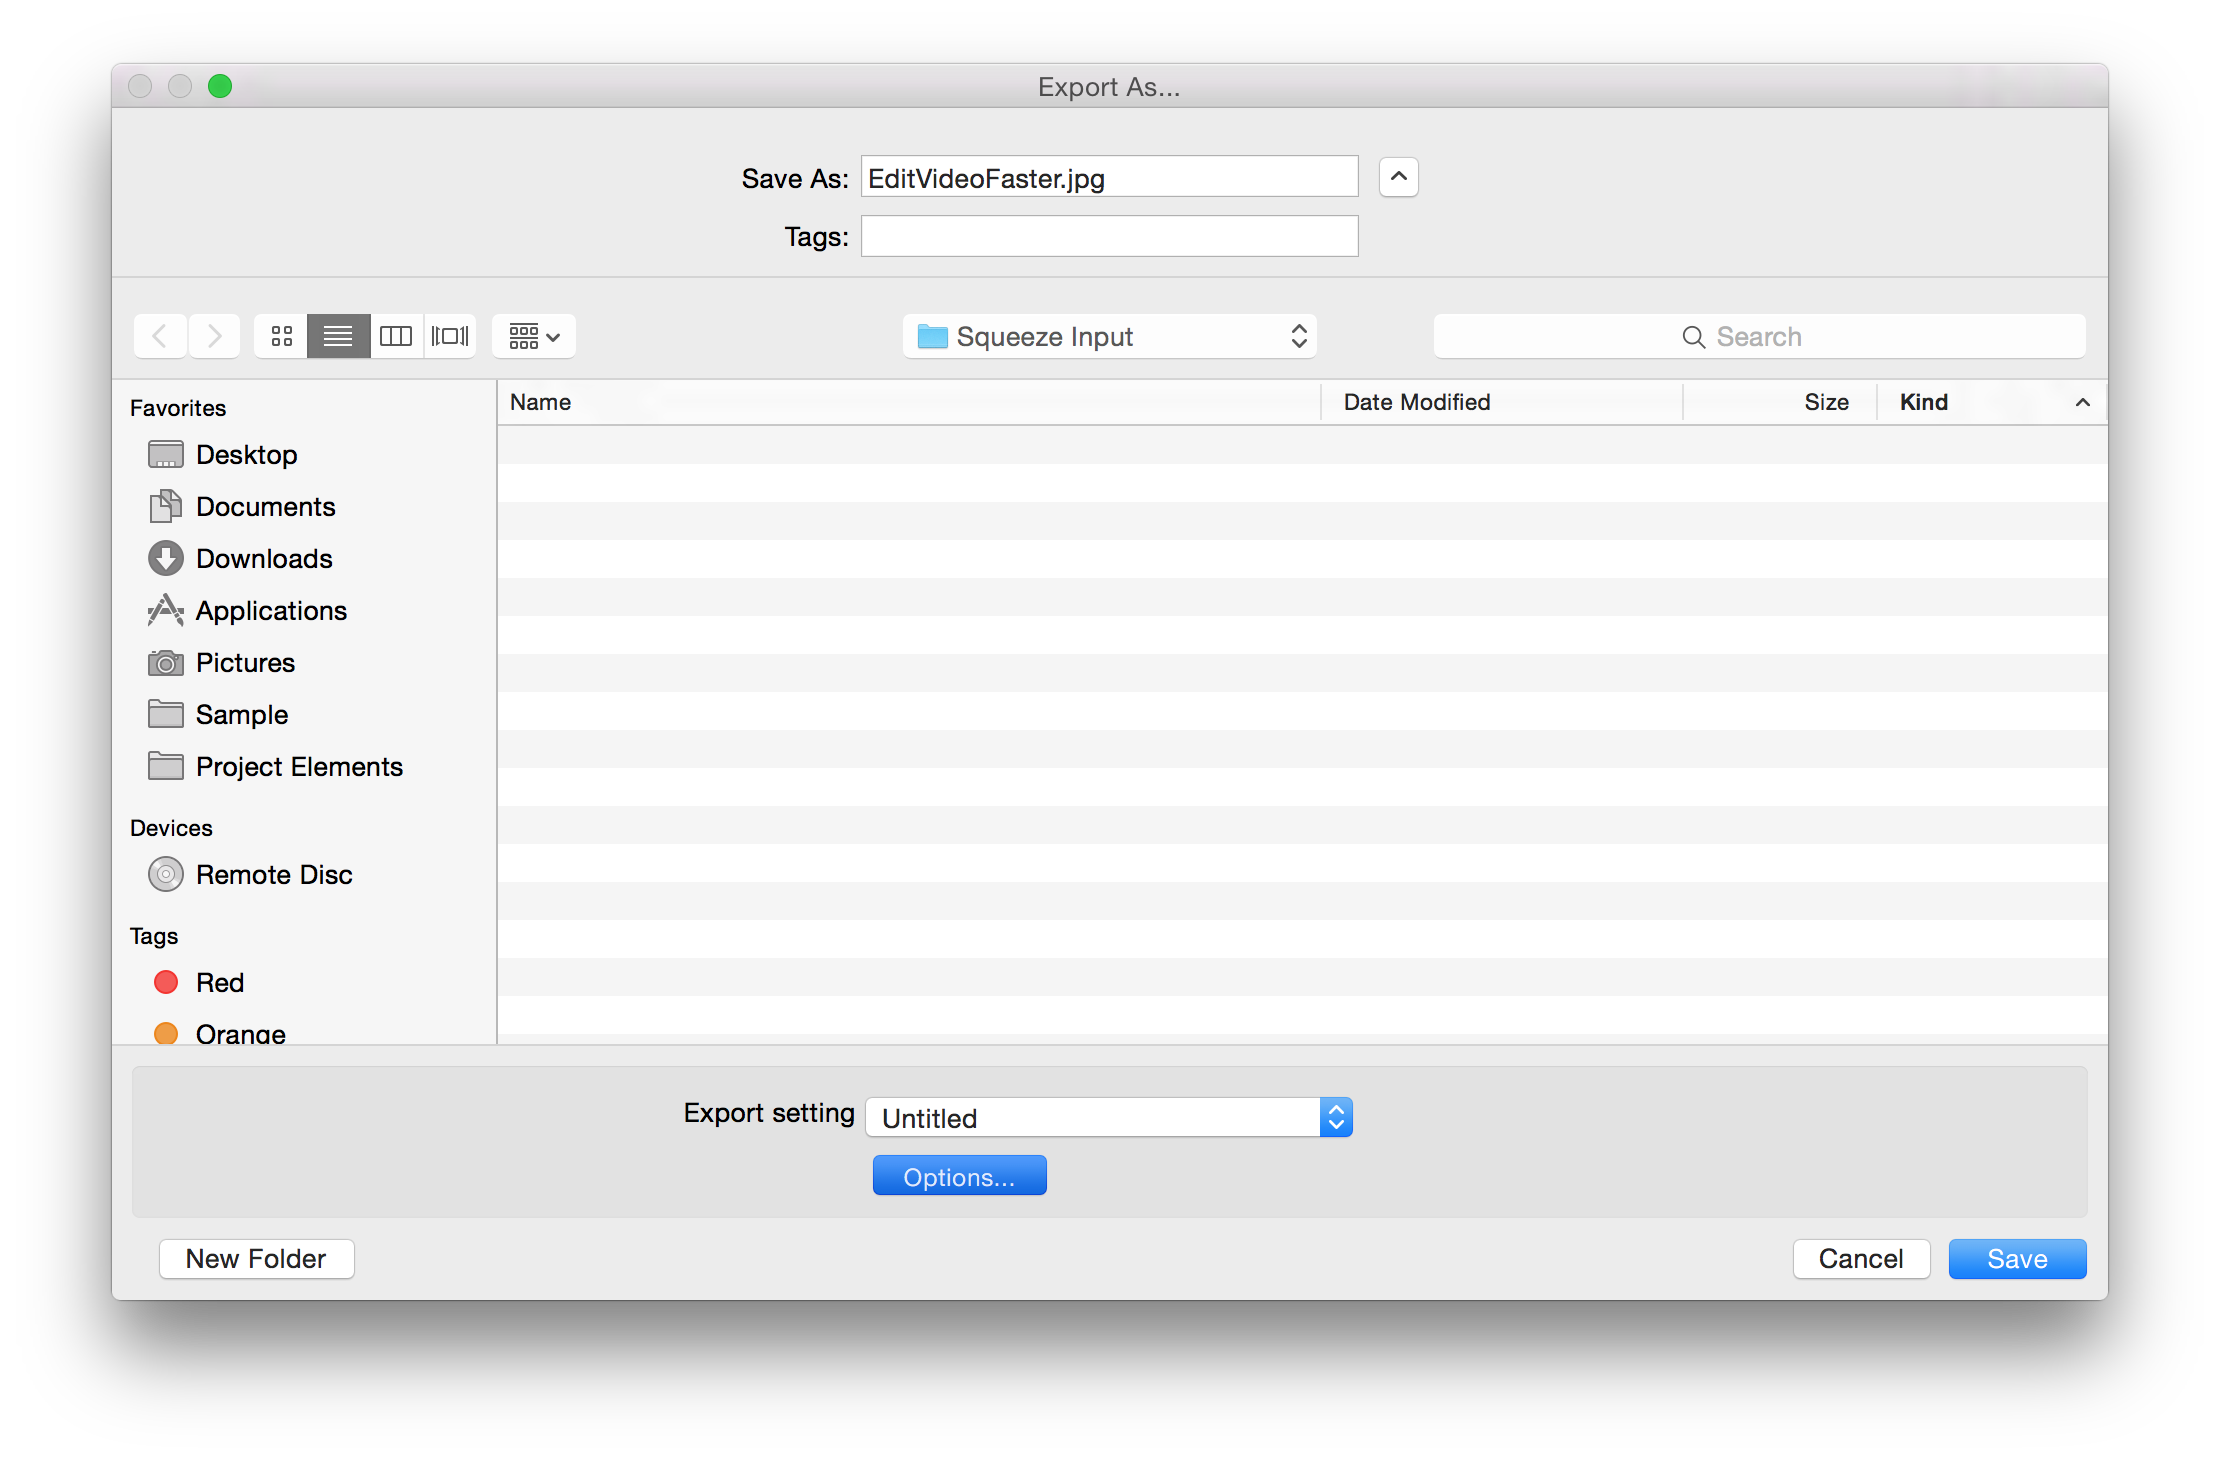
4. Name and Place Exported Graphic from Avid
Enter a unique filename for your new still graphic. Media Composer uses the sequence name by default. I usually don’t want this as my filename. Try something like [Project Name]-Still-[Version#]-[Date]-[1-2 word description].[file extension].
For example: TSwift-Still-01-092315-ConcertCU.jpg
Then select the destination folder for the file and click Save.
Final Notes on Exporting a Graphic from Avid
I find it fun to compile a list of saved export settings. Once every type of setting you use on a regular basis is saved and you have a naming convention down you can really speed up your workflow. Exporting still graphics shouldn’t take more than a few seconds once you are properly set up.
Thanks for reading! If you want to get emailed when I put out new posts (1-2x a week) make sure to enter your email address in the box in the top-right or the very bottom of this page.
Lastly, let me know what you think. Did this post help you? Do you export stills differently? Leave your answers in the comments below.
– Josh
Recommended Reading:
- About Edit Video Faster
- Deleting Database Files and Re-Indexing Media in Avid Media Composer
- Start Color Correcting with Avid Media Composer
- The Power of Presets for Avid Media Composer Editors
Do you guys use some online converter to fix your images?
I’m not exactly sure what you mean by “fix”. Media Composer exports PNGs, JPEGs, TIFFs, etc. If I need to change an image’s file format for whatever reason I use Photoshop. However a tool like that converter should work.