This tutorial will teach you how to adjust volume in Premiere Pro CC. Audio in Premiere Pro can be changed a couple of different ways. I’ll show you how to change the audio levels through the Effect Controls Panel, by clicking on the clip in the timeline, and by using keyboard shortcuts.
I started editing in Premiere Pro with version CC 2015. And the process hasn’t changed since then. So no matter what version of Premiere Pro CC you’re working in, how to adjust the volume will be 99.9% identical at the time of this writing.
Adjusting Volume in Premiere Pro Using the Effect Controls Panel
To begin, select the clip in the timeline who’s audio levels you want to raise or lower. Next find the Effect Controls Panel. If you don’t see it, go under the Window Menu and click Effect Controls. Or you can use the keyboard shortcut Shift+5 to activate the panel.
Now find the Level property in the Effect Controls Panel. If you work on a smaller screen like a laptop (like I am while writing this article) and the clip has video and audio, you’ll have to scroll down to find the Level property.
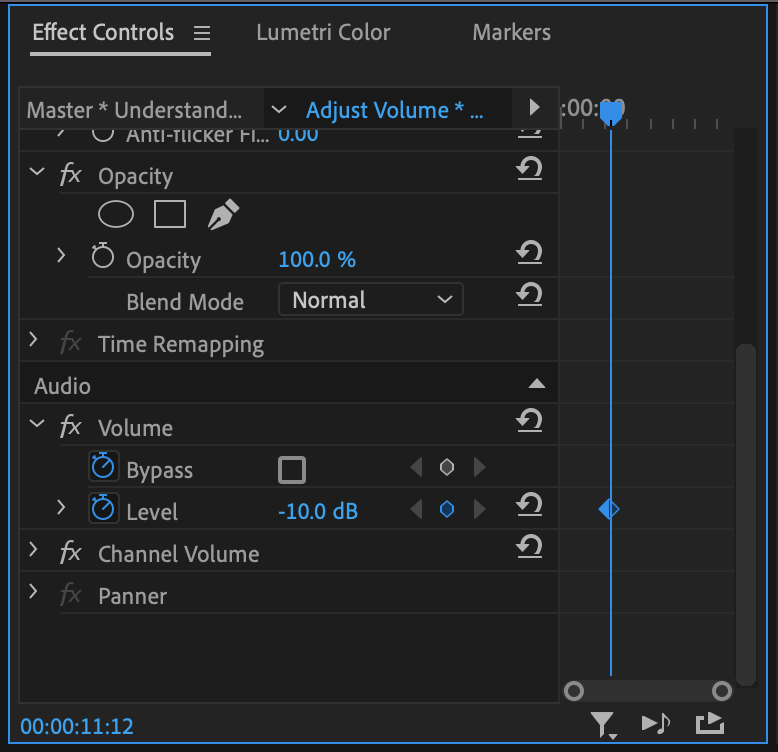
By default the Level property should be set to 0.0 dB. This means that the volume hasn’t been changed from what the clip / file was originally recorded at. Change 0.0 dB by clicking in it then typing a number or by clicking it and dragging it left of right. A positive number will make the audio on the clip louder. A negative number will make the audio softer. Maximum and minimum levels are discussed in the last section of this article.
When you changed the Level value a keyframe automatically was created. I prefer to typically not keep that keyframe hanging around. This is because if I come back later and want to adjust the volume of the clip and I change the Level value again, I inadvertently made a fade up or fade down of the audio if I didn’t go back to the exact same frame I was on before.
Normally I will either click the Stopwatch icon next to Level before making a change or immediate delete the keyframe after changing the volume. Deleting the keyframe doesn’t make the value of the Level go back to 0.0 dB.
Keyframes do offer one cool benefit though. More on that in a second.
🎧 Do you need stock music? Check my friends at Soundstripe. I believe they have the best selection, pricing, and licensing out there. For 10% off a subscription use the code “EVF” at checkout.
How to Adjust Volume in Premiere Pro CC Ridiculously Fast
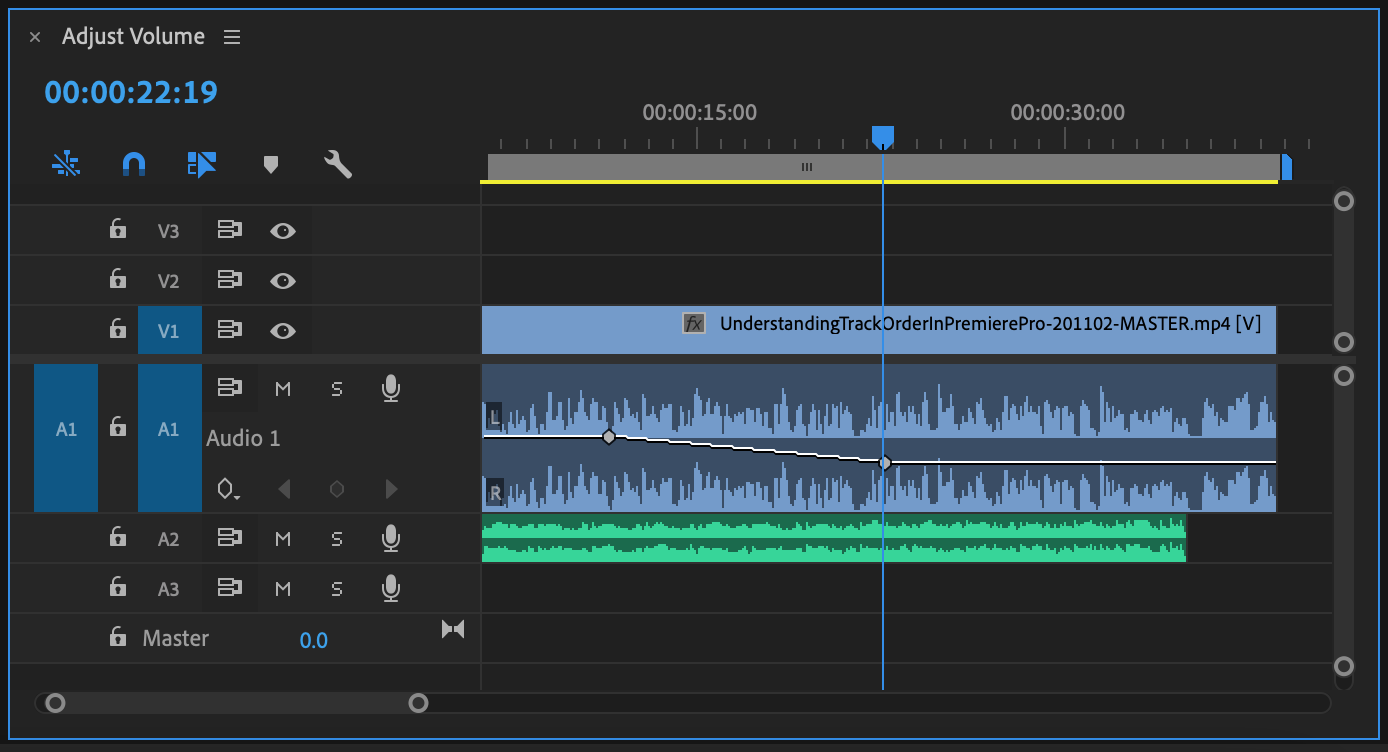
You can change the audio levels of a clip in Premiere in a very fast but IMO sloppy manner. When an audio track’s height is large enough, you’ll see a white line running horizontally across it. This is the Level property we were messing with a moment ago.
You can click that line and raise or lower it to change the volume for the clip higher or softer. This will not generate keyframes automatically like the Effect Controls Panel. However it is very easy to go overboard or make less-than-100%-perfect adjustments to your clip.
When I’m setting audio levels I want as much control as possible. You can get this by typing in a value in the Effect Controls Panel. When you click and drag this line up or down, you don’t get tiny increments. It might change by 0.7 or 0.4 or something like that. And I just don’t find that as a great way to work. This is completely a personal opinion though. I use this method all the time when I want to make some quick adjustments.
Oh yeah, I mentioned the cool benefit about keyframes. If the audio track’s height is tall enough then you can also click on the keyframes and adjust their height and time position. I do find it a bit easier to move keyframes around here rather in the Effect Controls Panel.
Changing Volume in Premiere Pro Using Keyboard Shortcuts
Instead of using the Effect Controls Panel or clicking the white line that runs through a clip in the Timeline, you can adjust the volume of a clip in Premiere Pro using keyboard shortcuts.
To do this, first make sure the Timeline Panel is active. Then note which tracks are selected. If you have audio on A1 and A2 but only A1 is active, only A1 will have its audio adjusted by the keyboard shortcuts. Alternatively, if A1 and A2 are both active then both clips will have their audio adjusted. Only the clips where the Time Position Indicator (the blue bar that tells you what time you’re at) is are effected by the keyboard shortcut.
To decrease the volume of a clip in Premiere Pro, use the [ key (the left bracket key). To increase the volume use the ] key (the right bracket key).
When you do this no keyframes are made. It’s essentially a global increase or decrease of the volume on the clip. If there are keyframes already on the clip, the volume from the entire clip is raised or lowered, leaving the keyframes in place and just nudging them up or down.
Enjoying this tutorial? Check out my Crash Course in Editing in Premiere Pro. Learn all the basics for editing in PPro in 22 minutes!
How Loud or Soft Can Audio Be in Premiere Pro?
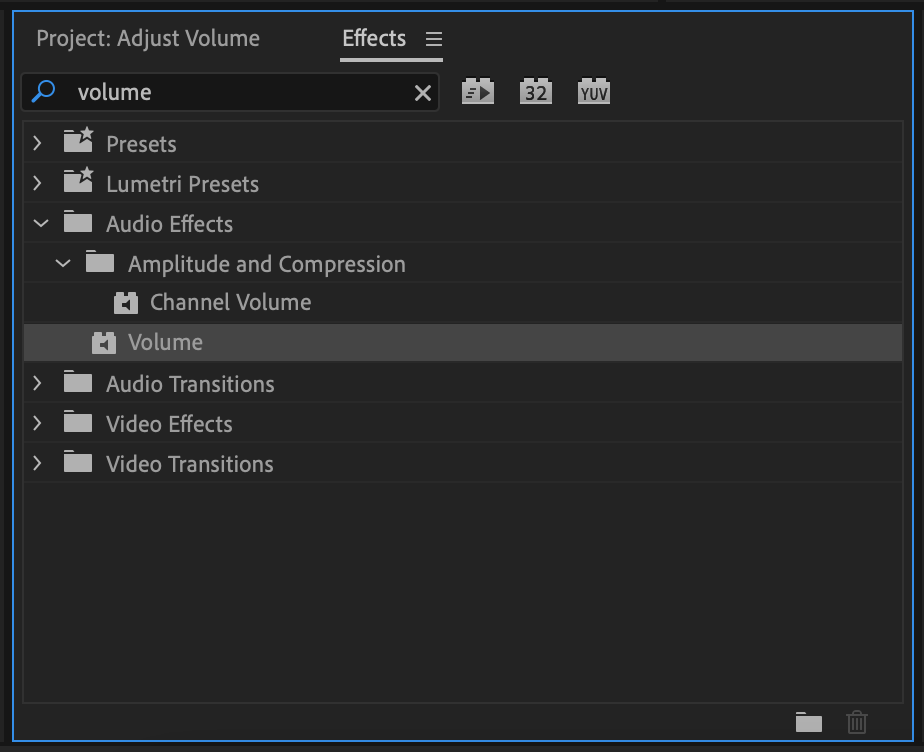
The maximum you can raise the volume on a clip in Premiere Pro is 15 dB. That’s usually enough. If you need the clip to be even louder you have two options. You can duplicate the clip / re-edit the clip into the timeline. So now it’s essentially doubled. Or you can go to the Effects Panel, search for “Volume” and add the Volume Effect onto the clip. Once it has been dropped onto the clip, go to the Effect Controls Panel and adjust the Levels property in the Volume Effect settings.
Just a warning though. If you are having to do this then you run the risk of over-modulating the audio and making it sound, well, really bad. You probably would want to go into a program like Audition to cleanup the audio but that’s way outside of the scope of this writing.
Audio clips can be turned down to -infinity dB. That’s right, negative infinity. It basically doesn’t exist outside of taking up space in your timeline. Generally once you get to -50 dB you can’t hear anything. Most of my nat sound sits around -30 dB. It’s subtle and noticeable but it doesn’t get in the way of the rest of the audio that’s in the video.
I sincerely hope that this tutorial helped you. If it did, please consider subscribing to my email newsletter. Do you have questions about how to adjust volume in Premiere Pro CC? Leave them below in the comments!
– Josh