Presets will make you a faster editor. Period. Putting systems in place for often-used tasks makes you a more efficient editor. Presets are some of these systems. You can preset many aspects of your NLE, especially Avid Media Composer. Below I discuss four of my favorite areas you can use presets in Avid Media Composer.
This post focuses on presets in Avid Media Composer but many concepts cross over into other NLEs like Premiere Pro and Final Cut Pro X.
Workspaces/Toolsets in Avid Media Composer

There are 3-5 Workspaces (sometimes referred to as Toolsets – different but essentially the same thing which I’m not going to get into today) you should customize, save and map to your keyboard. These are preset arrangements of your tools on the screen.
The first is obviously Source/Record Editing. This is your bread and butter Workspace, which you’ll most likely spend the bulk of your time in. You use it for your standard editing – laying in shots, moving them around, manipulating time, etc. Why do you map this to your keyboard? Anytime you are done in another Workspace or you have random tools open, this will put you back in your default editing setup.
If you want the Timecode Tool, Markers, Audio Tool and Audio Mixer open while you are editing in this Workspace like I do, make sure the Source/Record Editing Workspace is selected under Windows > Workspaces. Then open all the tools you want and position them on your screen and hit Save Current under that same menu.
If you want to see a tutorial over on my YouTube channel let me know in the comments section!
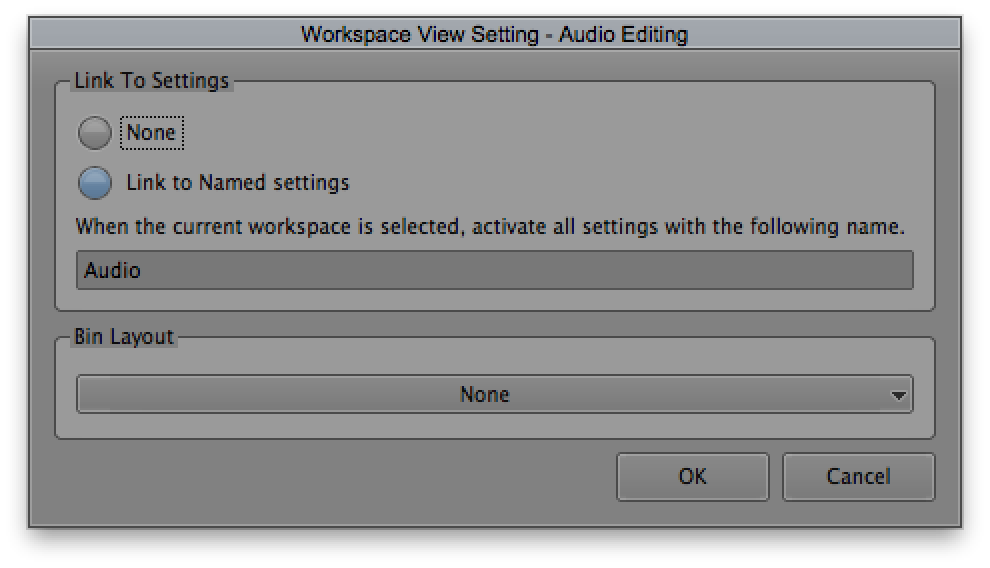
Audio Editing is the next Workspace to setup. Besides setting up my audio tools where I want them, I like to tie this together with my Audio Timeline View, which will be discussed in the next section. To do this, go up to Windows > Workspaces > Properties… then type in “Audio.” If you have a Timeline View named “Audio” it’ll automatically switch to that view.
Color Correction is another Workspace that should be setup. I’ve found that the only real things you need to adjust are the location of the monitors and Color Correction Tool along with what goes into the monitors by default. I tend to like having the left monitor being set to Previous, the middle monitor set to Current and the right monitor set to RGB Parade.

If you don’t have a traditional confidence monitor or work solely on a laptop/single monitor system like I do at times, the Full Screen Playback Workspace should be mapped to your keyboard. FYI – sometimes Full Screen Playback won’t run on the monitor you want it to if you are running two screens or switch between 1-2 screens often. If that happens, go to Settings > Full Screen Playback. Then move the dialog box to the monitor you want to be full screen. Then click Select Monitor and click OK.
The last Workspace you might want to setup is Effects Editing. To be honest, I don’t use this. I have my Effect Editor positioned in my Source/Record Editing Workspace. Do this by opening the Effect Editor, save the current Workspace, close the Effect Editor then save the current Workspace again. This tells Avid Media Composer “I want this tool positioned here but don’t want it open when I activate this Workspace.” From there, I map Effect Editor to my keyboard always staying in the Source/Record Editing Workspace with it open. The advantages of having the Effects Editing Workspace setup is that you might want more room for your monitors or the Effect Editor than you would with the Source/Record Editing Workspace. For me, I don’t find it that useful but you might.
Timeline Views Presets in Avid Media Composer
When you jump on someone else’s User Settings the first difference you’ll notice is their Timeline View if they have one setup. Some like to drag the timecode track between the video and audio tracks. You’ll definitely notice if they color their tracks differently (I like pale yellow-orange for video tracks and a light blue for audio). However you want to stylize your timeline view it’s up to you – just make it efficient for your workflow.
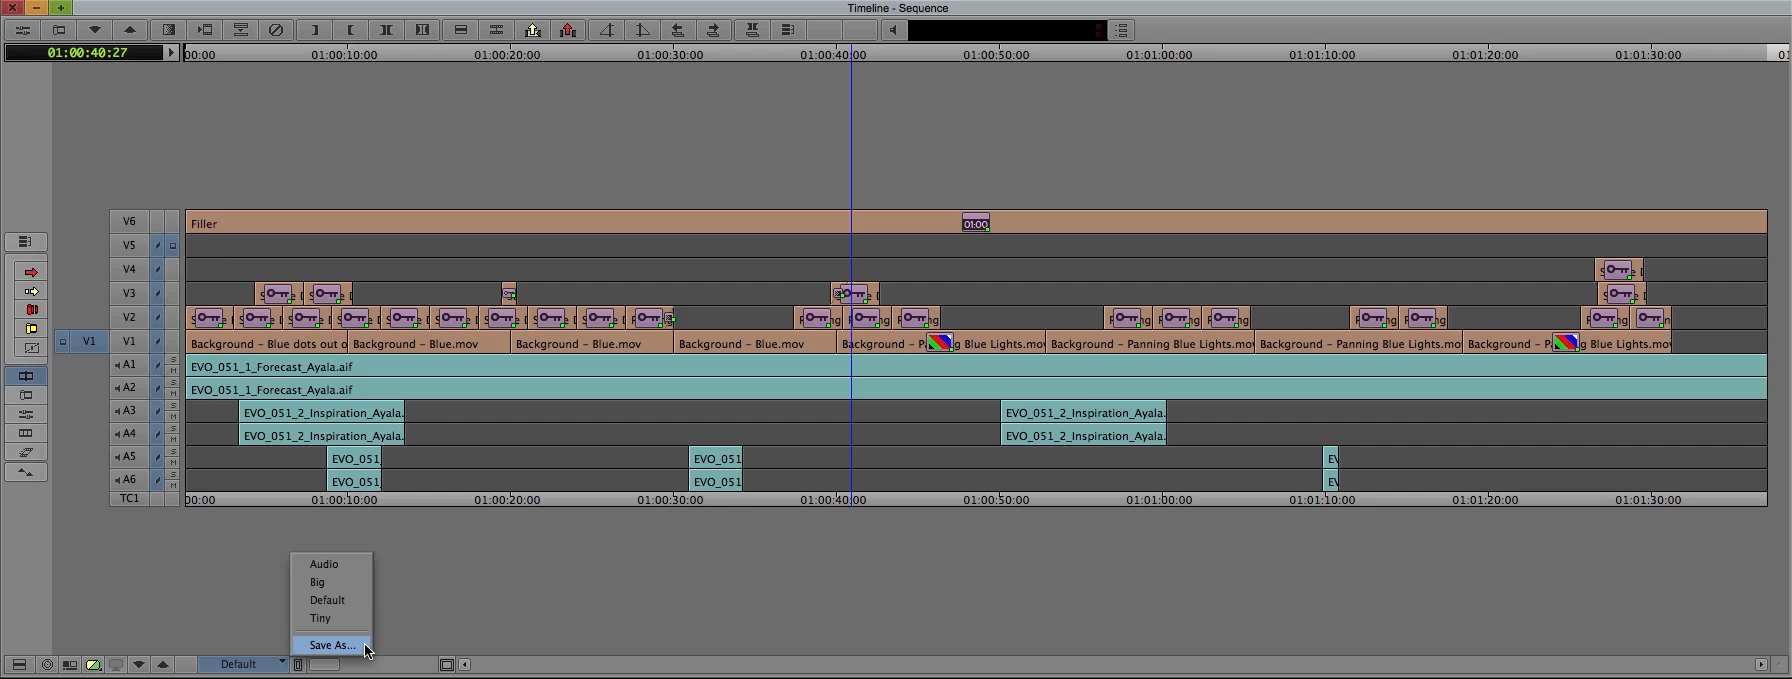
There are four basic timeline views that I use and firmly believe every editor should use as well. Those are: Default, Audio, Tiny and Big/Stringout.
I wrote a post over on ScreenLight’s blog some time ago where I go into detail on each one and how to manipulate your timeline for each workflow. The gist of it is to change the track sizes, color and pick the data shown then save it at the bottom of the timeline.
Seriously though, if you’re interested in doing this (and you should be), read the aforementioned post.
Quick Transitions Presets
Quick Transitions are great if you use any transition frequently, which I assume you do. This is the dialogue box that pops up with you hit the \ key to set your dissolves. Media Composer comes with Dissolve, Film Dissolve, Film Fade, Fade to Color and a few others as defaults. But do you know you can add your own?
Create a bin labeled exactly Quick Transitions. Then drop in your own transitions (wipes, flashes, etc.).
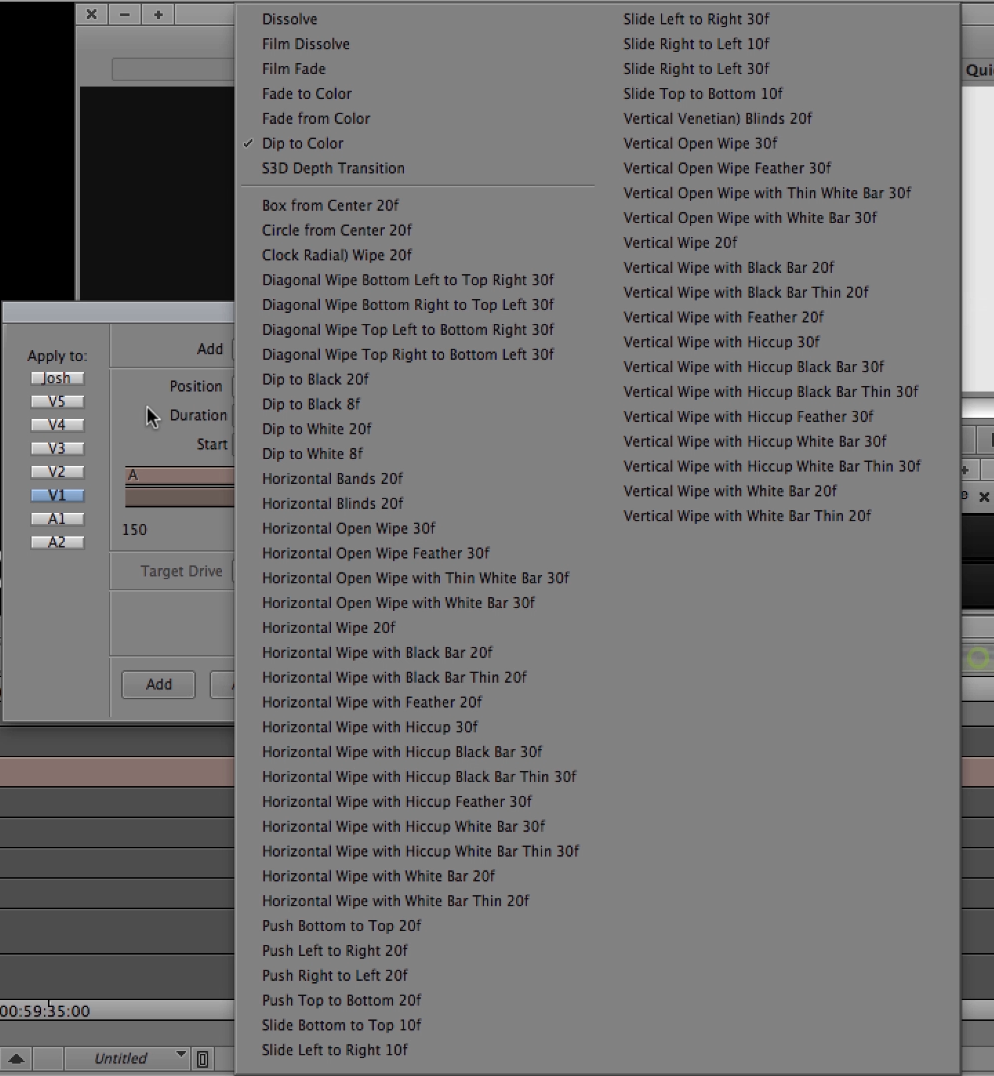
If Avid’s handful of Quick Transitions presets aren’t enough for you, I have a surprise for you. It’s a bin full of over 50 preset Quick Transitions. You can get it along with more information here.
Export Settings
Each and every time you export a file from Media Composer you should save an Export Setting if it’s something different than you already have. Why? You can export a QuickTime movie at least a thousand different ways but you might not remember every detail (frame rate, key frames, compression type, etc.) of the handful of types of .movs you use.
Why try to remember every detail if you can save the settings with a detailed name each time?
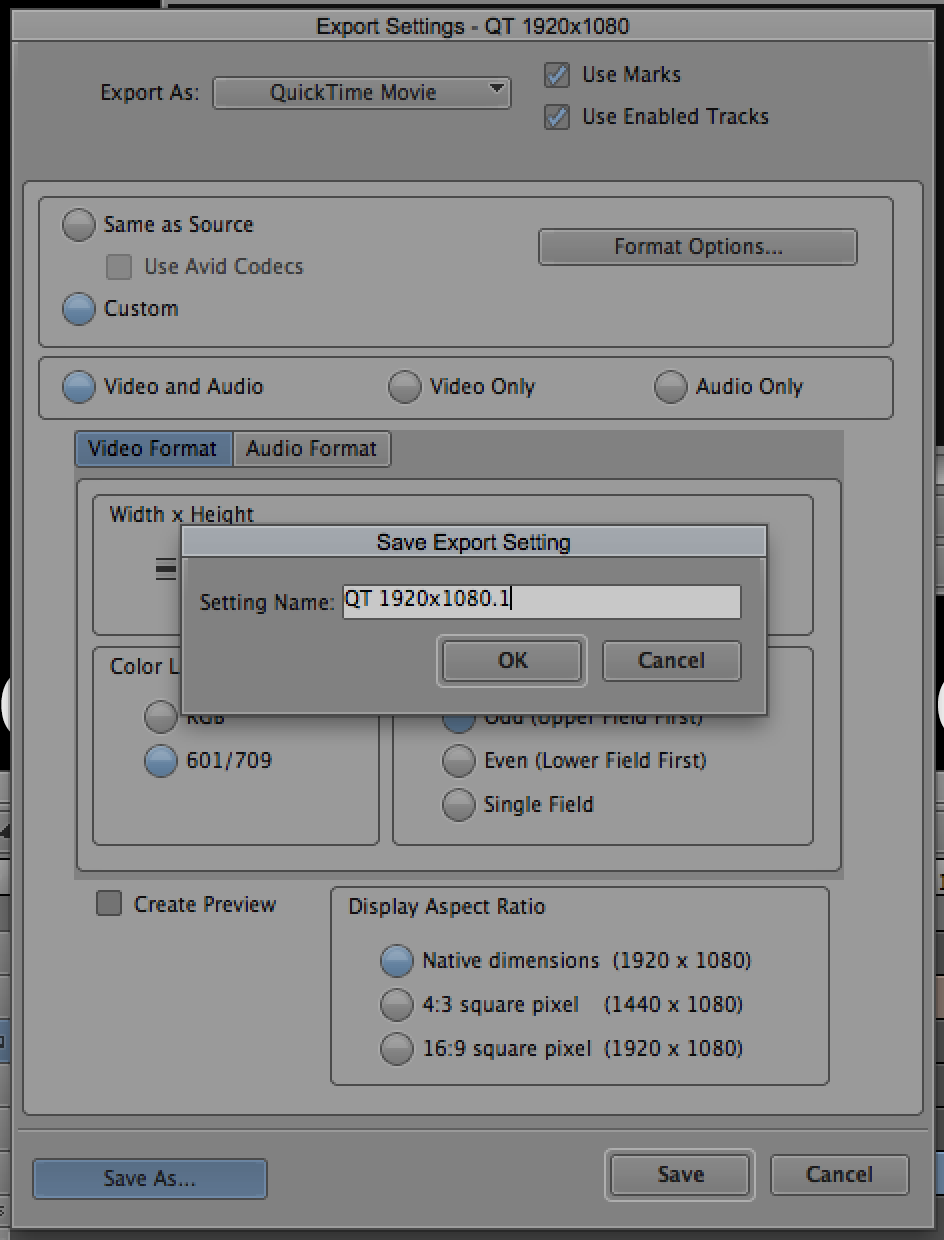
When you export, click on Options under Export Settings. Adjust the parameters for your export then click Save As… Give it a unique name – ex: QT 1920×1080 30fps or QT-HQ-WebDeliveryForCompression. Next time you go to export you can find that setting in the drop down menu and won’t have to change any parameters. You can do this for any file that Media Composer exports (.pngs, .wavs, etc.).
Summing Up
Presets save you loads of time and only take a few minutes to setup. Workspaces, Timeline Views, Quick Transitions and Export Settings all do this. What are your favorite presets to create in Avid Media Composer or your NLE of choice?
Lastly – if you want to get a jumpstart on your Quick Transitions bin, head on over to this page. It’s simple, affordable and only takes a few minutes until you have 50+ preset Quick Transitions.
2 thoughts on “The Power of Presets for Avid Media Composer Editors”