
This article shows you dozens of different pre-made transitions that are already sitting in After Effects waiting for you to use. They’re tucked away but once you know where to find them they’re pretty easy to use. Here’s where you can find them and how to use them:
Using Animation Presets to Create Transitions in After Effects
For simplicity’s sake, let’s say you already have your Comp setup and have a layer you want to apply a transition effect to in After Effects. To begin, find the Effects & Presets Panel. If you can’t find it, under the Window menu find Effects & Presets. Choosing that will pop it right up.
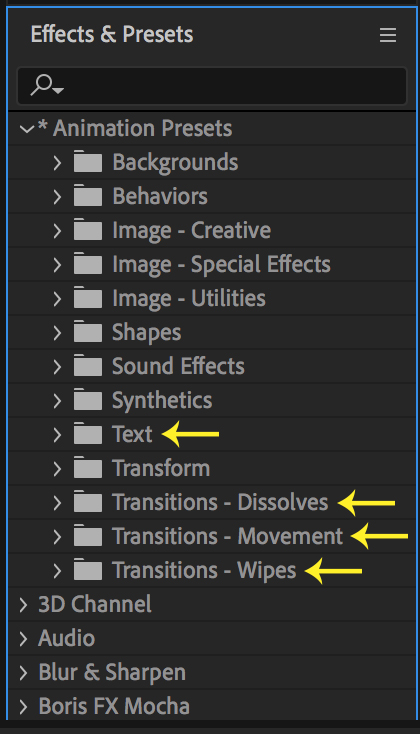
Right away you should see the *Animation Presets folder in the panel. It’s the very top folder. Next twirl it open. Take a deep breath — there’s a lot in there. For this tutorial we’re going to focus on four folders: Text, Transitions – Dissolves, Transitions – Movement, and Transitions – Wipes.
The Three Transitions Presets Folders
Now twirl open the three Transitions folders. You can take any of these transition effects and drag and drop them onto a layer. Wherever your time position indicator is in the Comp is where the animation will begin. Give it a shot. Drag and drop an one of the pre-made transitions After Effects has provided onto one of your layers.
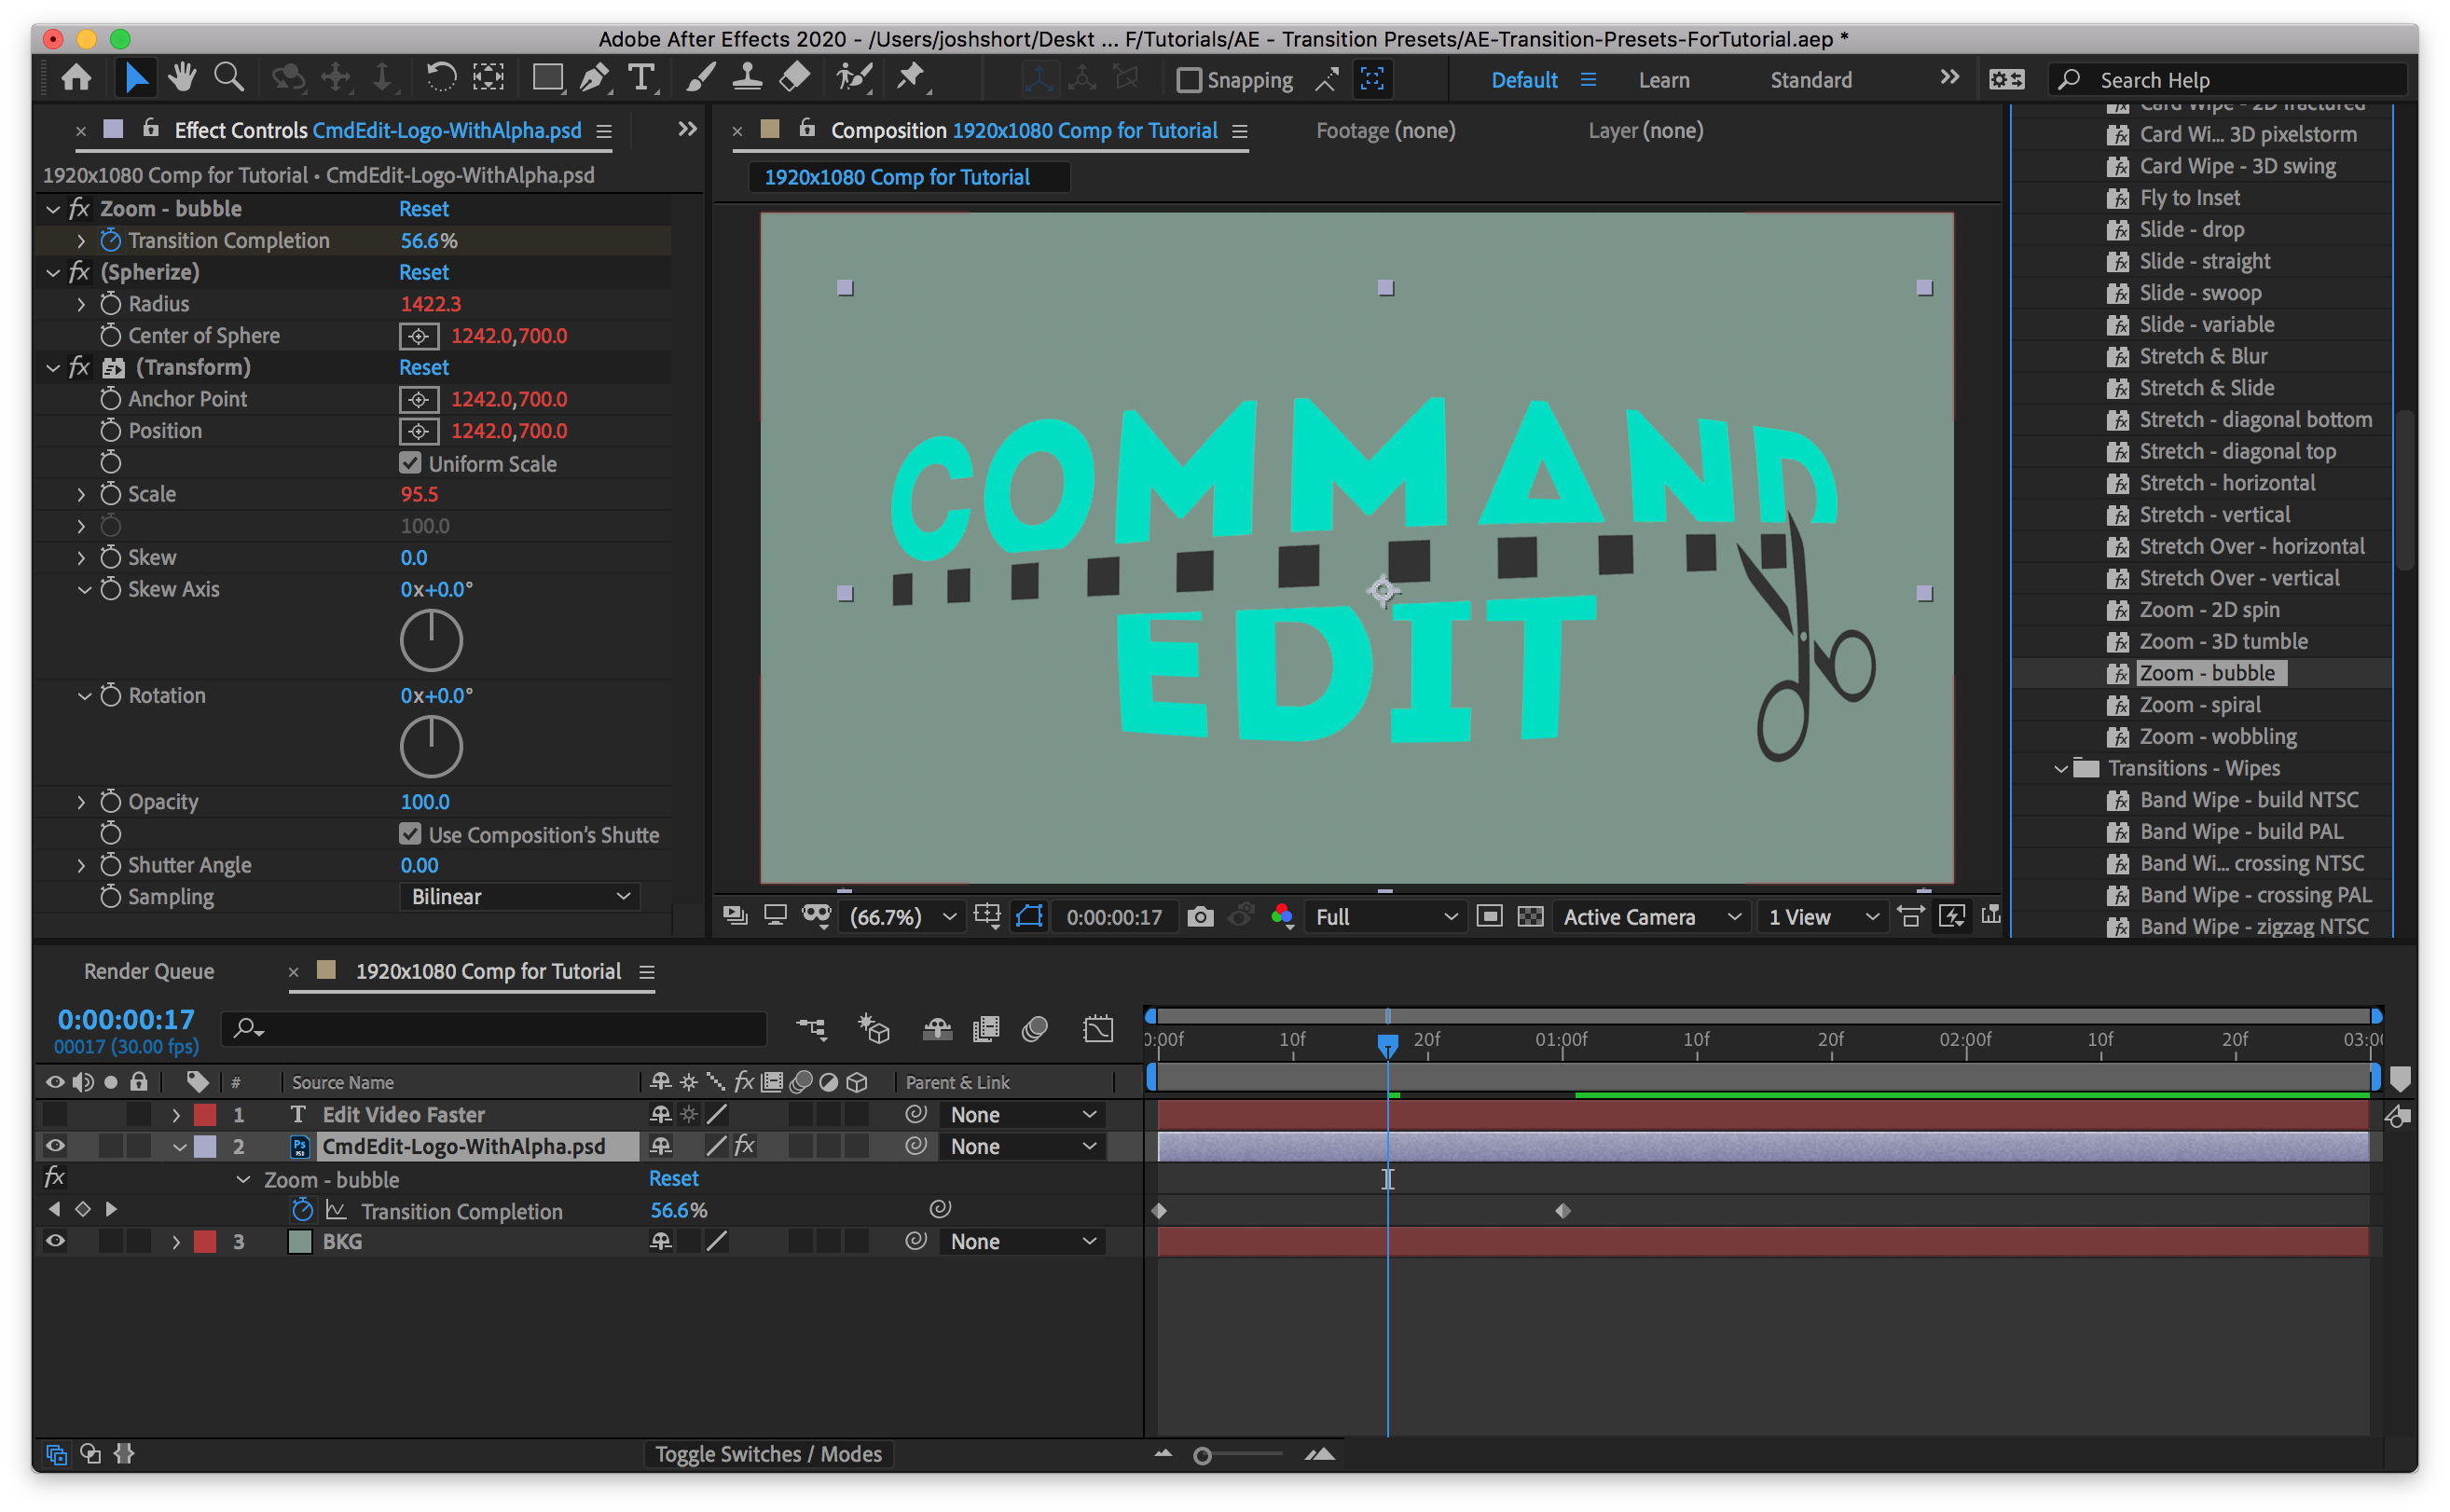
Uhh… what happened? You might not notice that anything happened. Select the layer and hit the “U” key to show all the keyframed properties. Also open up the Effect Controls Panel.
Enjoying this tutorial? Check out my tutorial on the simple and useful Replace Layer shortcut in After Effects
By default, all the transitions in the three Transition folders are 1 second long (I’m 99% sure of this, but could be wrong!). Now that you can see the keyframes, you can click and drag them to adjust the length of the transition. You can even flip their placement to reverse the transition. For example if you used the Slide – swoop transition if you flip the keyframes it would now swoop off instead of swooping on.
All of these After Effects transitions in the *Animation Presets folders are customizable. You do this in the Effect Controls panel.
To be honest, there’s a lot of junk in these folders. Things you’ll absolutely never use. A few of the good ones in my opinion are:
- Fade – dip to black
- Fade – flash to white
- Fade – overexposed
- Slide (any of them!)
- Stretch & Blur
- Stretch & Slide
- Grid Wipe
I strongly recommend experimenting and going through as many as you can. Make some mental notes, or heck, some physical notes on which ones you like so you can remember for future projects.
Do you need stock music? Check my friends at Soundstripe. I believe they have the best selection, pricing, and licensing out there. For 10% off a subscription use the code “EVF” at checkout. 🎧 (affiliate link)
Text Transitions Presets
Let’s head back to the Effects & Presets Panel. Next find the Text folder inside the *Animation Presets folder.
There’s a ton in here. And, unlike the Transitions folders we just covered, there’s a lot of gems in here.
There are a couple differences between the Text presets and the Transitions ones. First, these can only be applied to text layers. And second the duration of the transition varies with each one. Some are a second but others aren’t.
The same rules still apply though. Wherever your time position indicator is, that’s where the transition will begin. You can flip the keyframes and alter the transition in the Effect Controls Panel.
Seriously, mess around with these. You’ll be surprised with how many transitions are just… there!
I genuinely hope that this tutorial helped you. If it did, please consider subscribing to my email newsletter. Do you have thoughts on these pre-made transitions in After Effects? Leave them below in the comments!
– Josh